Feature a project
Feature a project
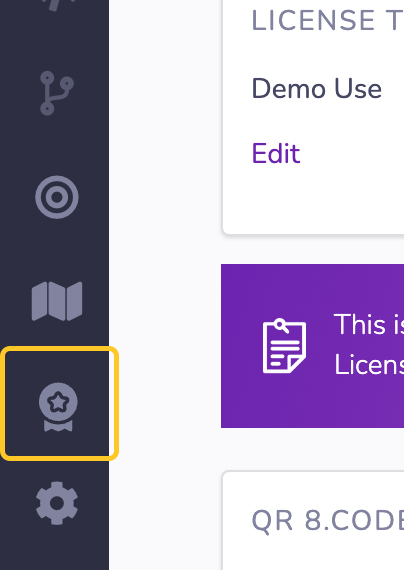
To publish a Featured Project on your Public Profile:
- Select an existing project or create a new project in your workspace.
- Click on Feature Project in the left navigation.
- Fill out all of the mandatory sections on this page. This is required order to be able to publish your Featured Project page.
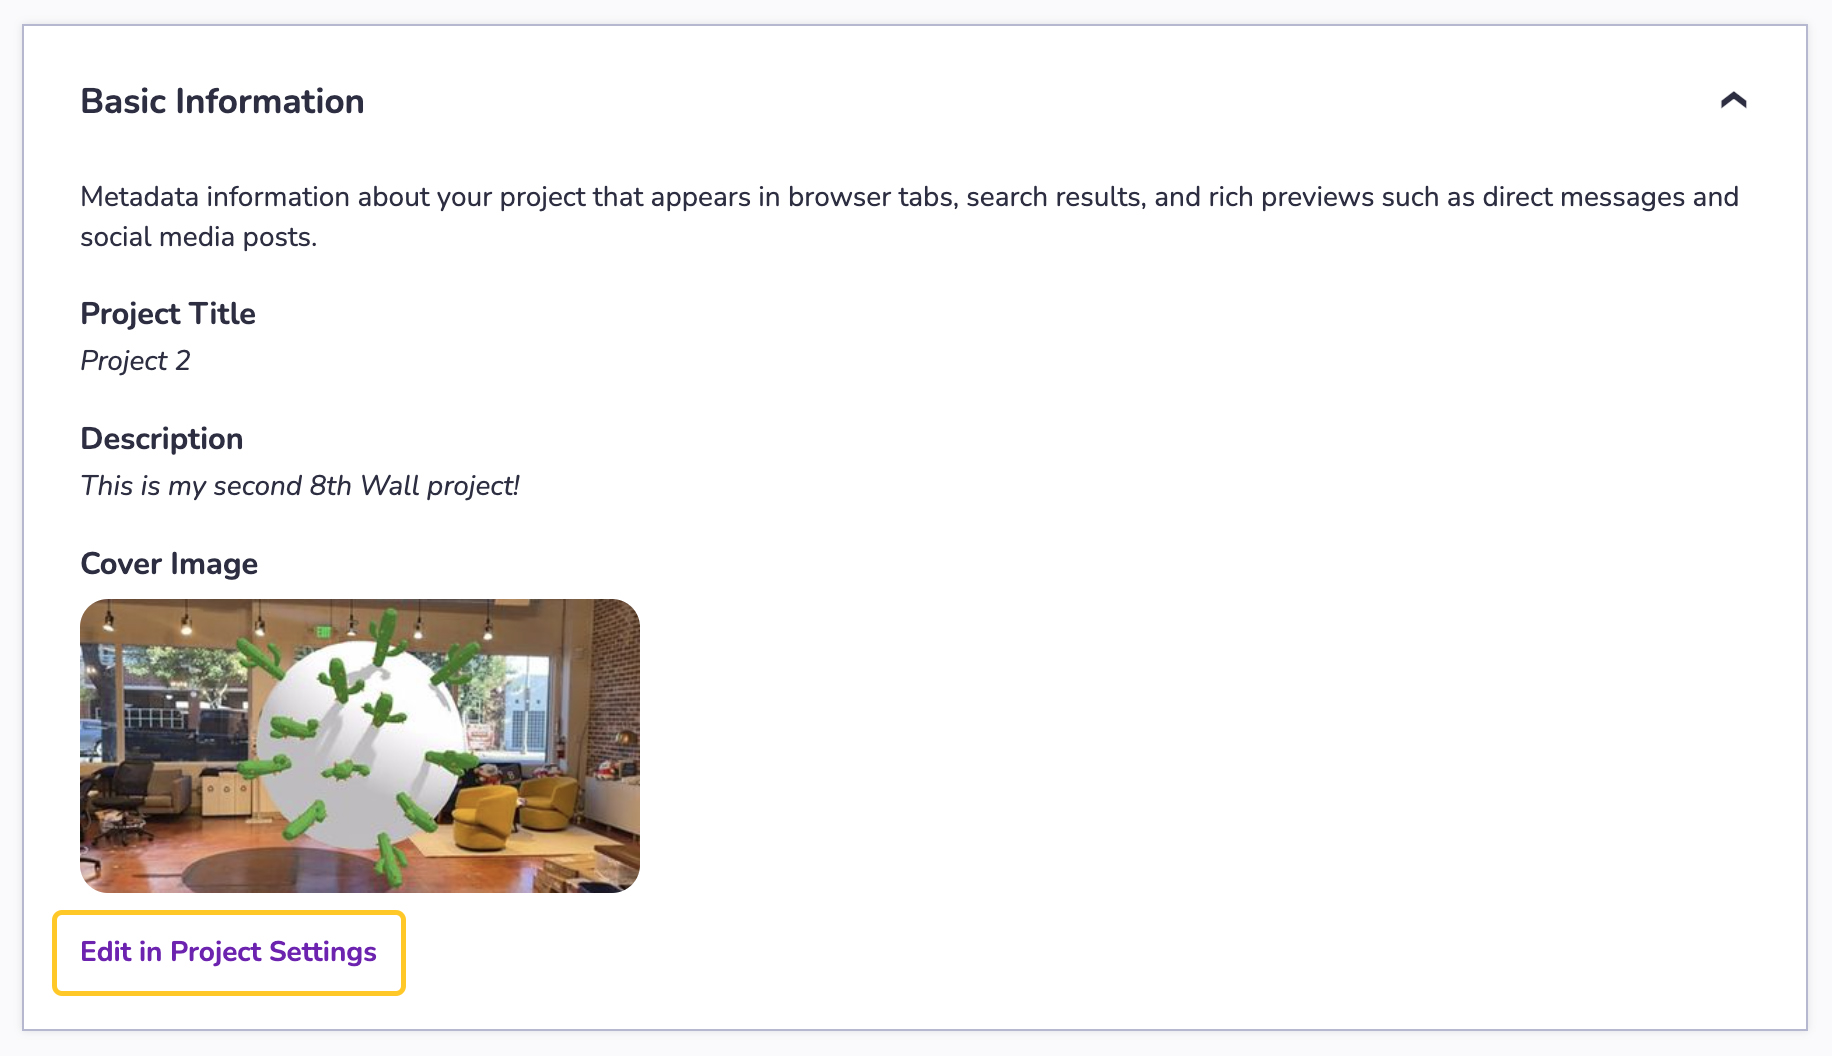
Basic Information
If Basic Information of your project is missing (Project Title, Project Description or Cover Image), you will be asked to update these details on the Project Settings page. Updating Basic Information will not impact your project code.
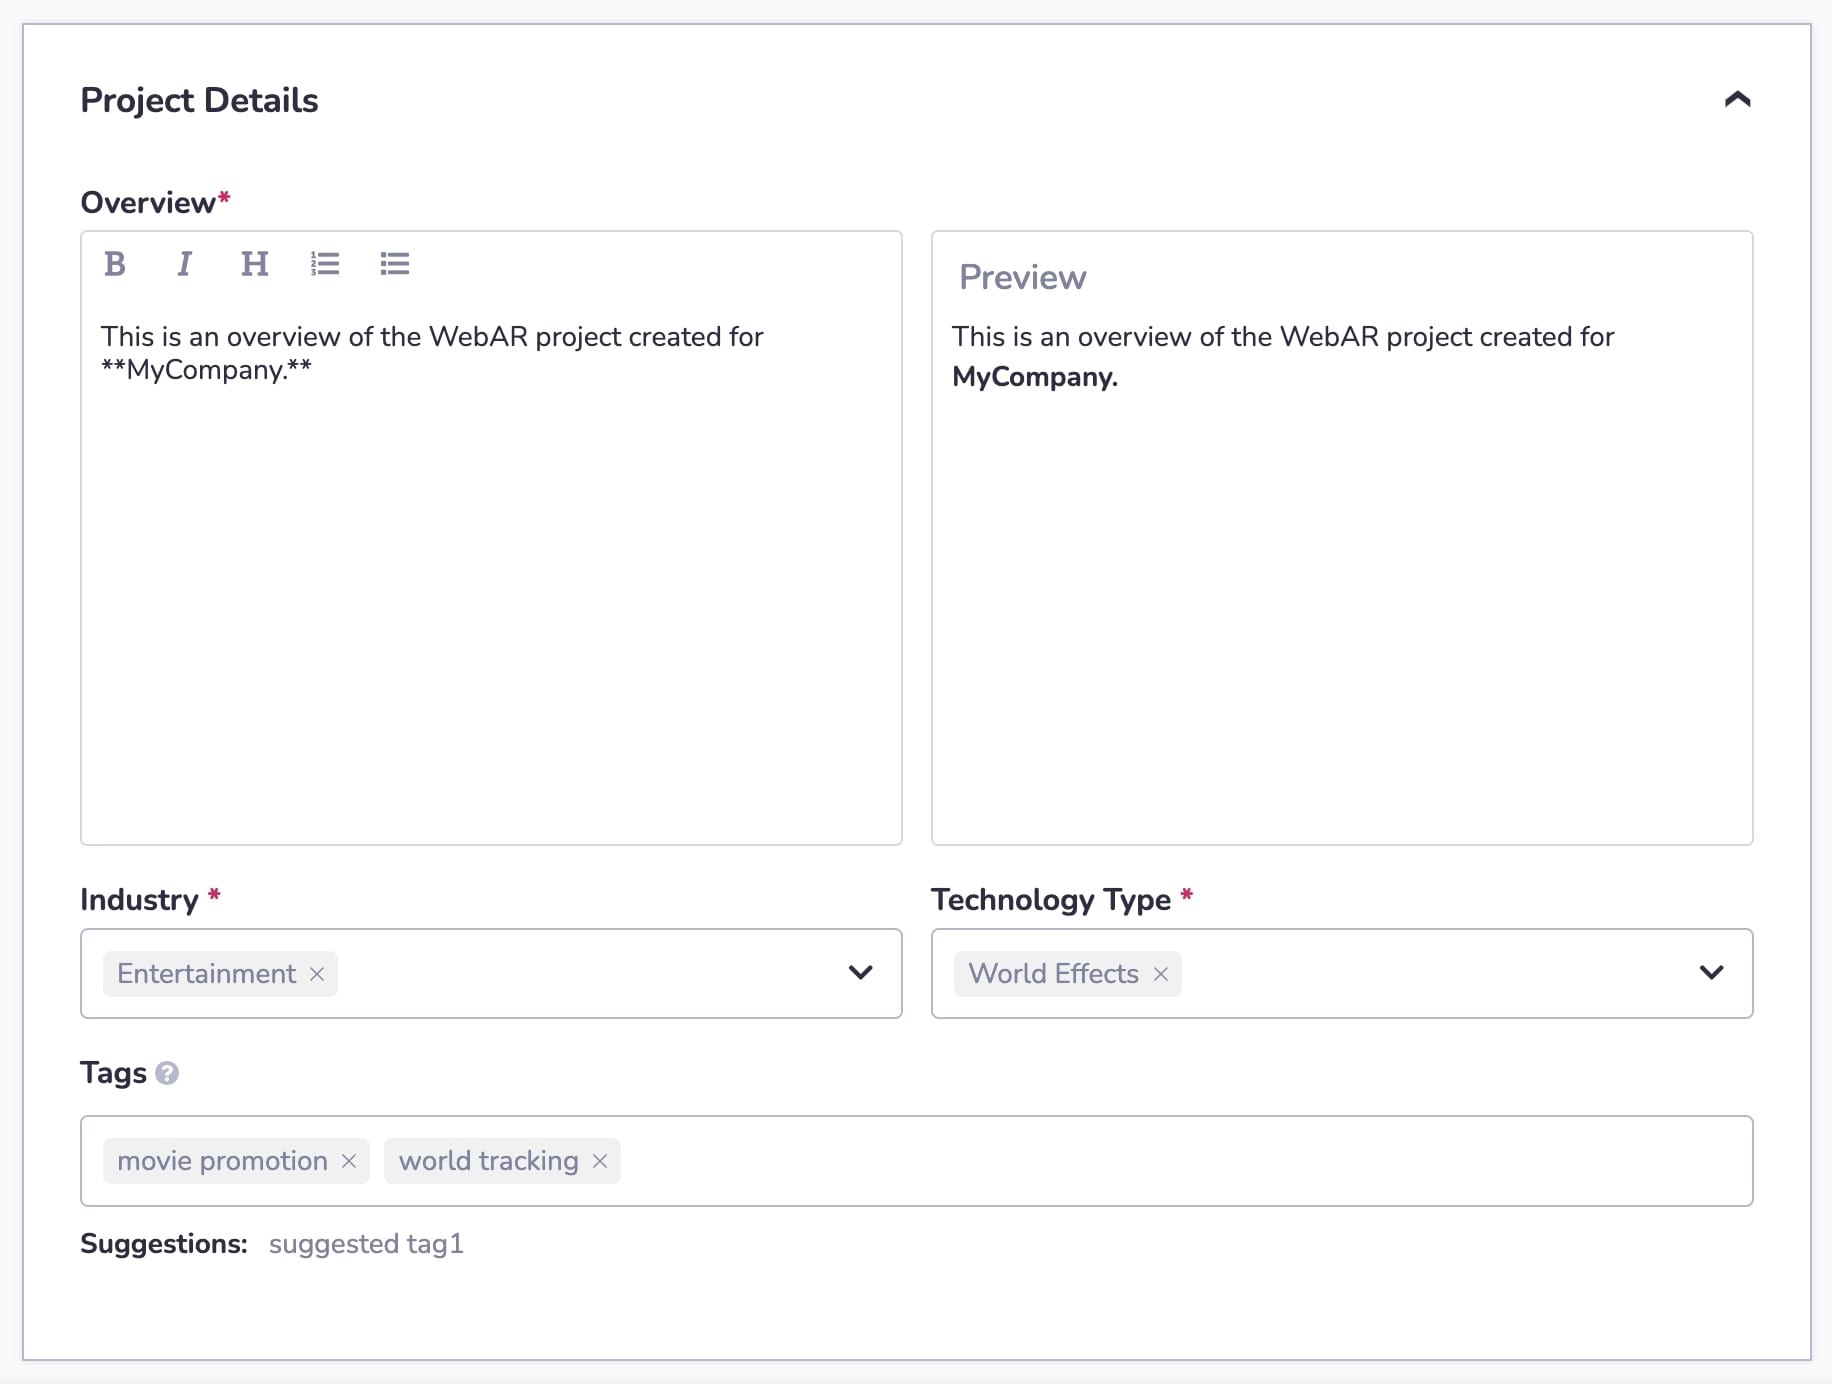
Project Details
-
Overview: Enter information about the project you are featuring in the Overview area in the Project Details section. Describe your project, project goals, and details about its development and design.
- Add Formatting with the rich media buttons:
- Headers (H)
- Bold font (B)
- Italic font (I)
- Bulleted and Numbered lists.
- Preview your formatting using the Preview pane on the right.
- Add Formatting with the rich media buttons:
-
Tags: Enter or select up to five tags for your Featured Project. Your featured project must have at least one tag to be published. To add a tag, start typing. Use a comma or hit return to register them. Use the backspace to delete a tag. Click on suggested tags below to add them to your list of tags.
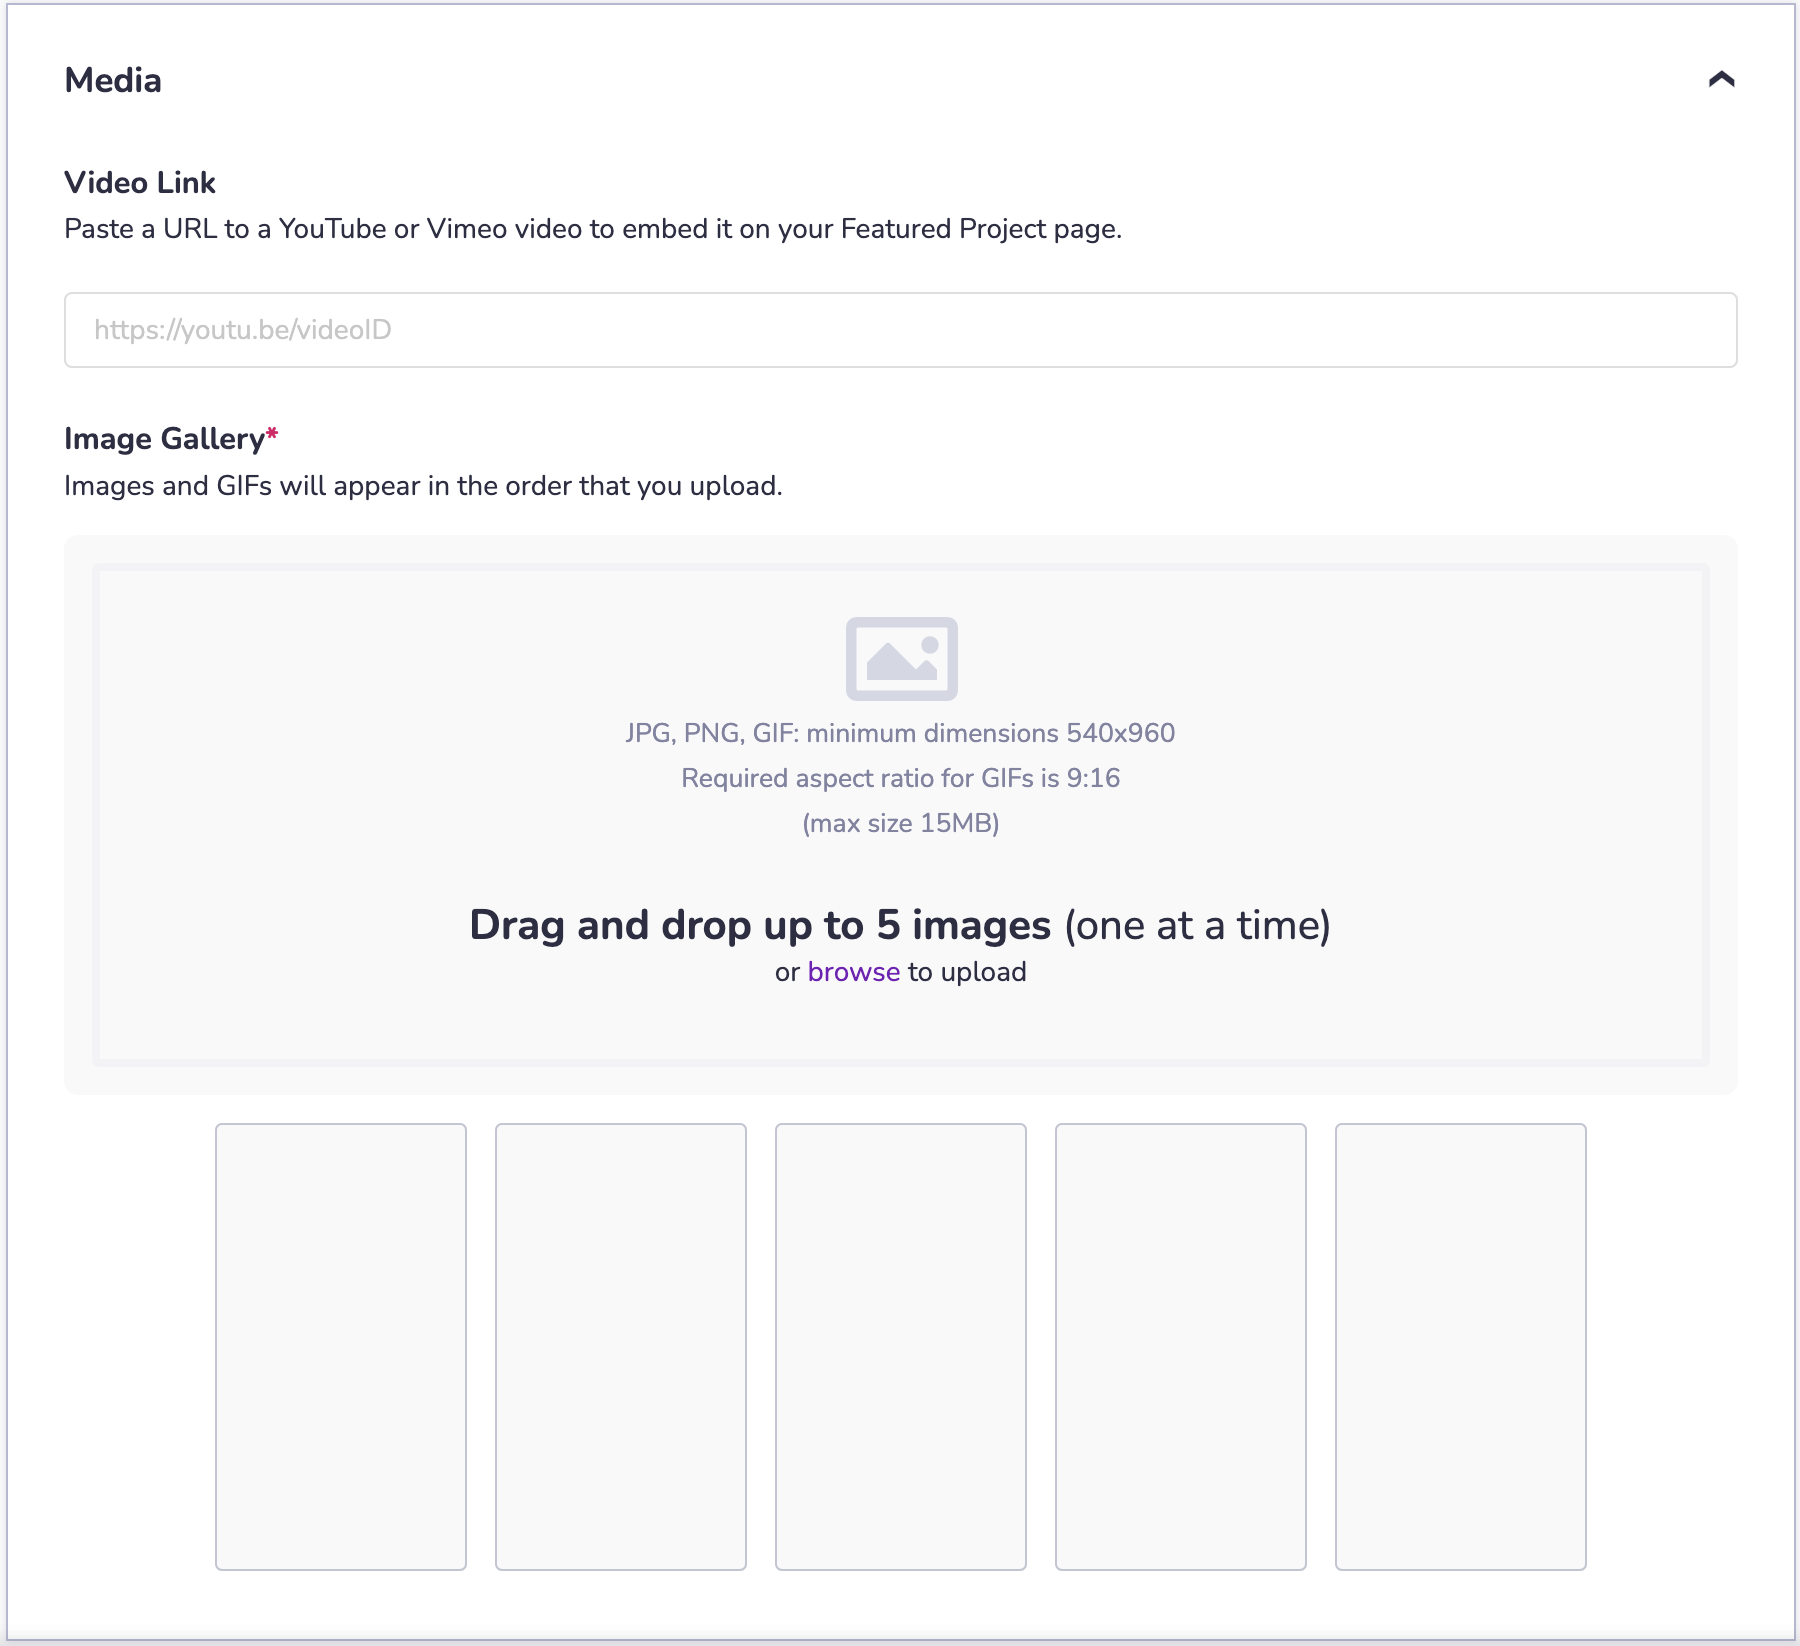
Media
-
Youtube or Vimeo Link (Optional): Enter a YouTube or Vimeo link in the Video Link field. This video will be embedded on your Featured Project page and will be set to auto-play (muted) when a user visits the page.
-
Image Gallery: Upload images and GIFs by either dragging and dropping the files into the Image Gallery area under the Media section or by clicking on this area to select files from your device. Note:
- You can upload a maximum of 5 images or GIFs.
- Projects must have at least 1 image or GIF to be published.
- JPG, PNG, GIF formats are supported and must have a minimum dimension of 540x960.
- Images can be cropped using the provided cropping tool.
- GIFs must be uploaded using the required aspect ratio of 9:16. GIFs cannot be cropped.
- The maximum file size for images and GIFs is 15MB.
- Images and GIFs will appear on the published page in the order they are uploaded.
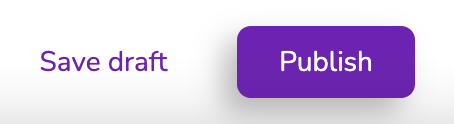
Publish
-
Publish: Once you have completed all of the manatory fields and are ready to add this Featured Project page to your Public Profile, click the Publish button.
-
Save Draft: If you aren't quite ready to publish the Featured Project page to your Public Profile, but want to save your progress so you can leave the page and come back later, click the Save Draft button.
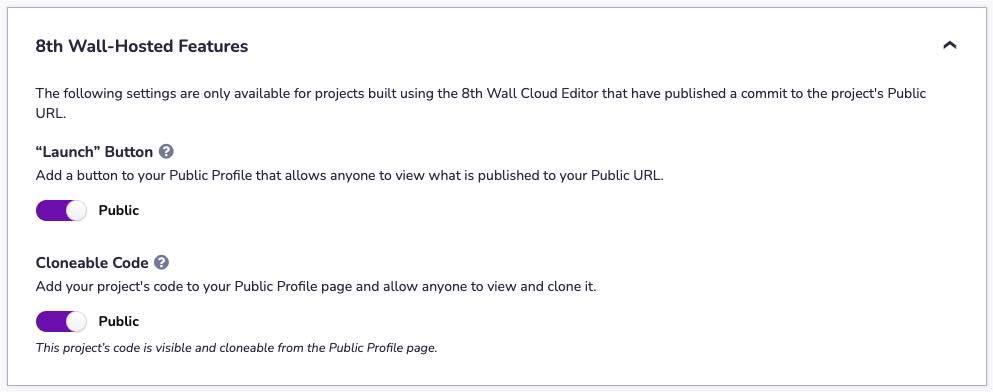
8th Wall-Hosted Featured Projects
Projects built using the 8th Wall Cloud Editor and that have published a commit to the project's Public URL will have access to additional (and optional) 8th Wall-Hosted Features. For all other Featured Projects, this area will remain locked. These features are optional and are not required to publish a Featured Project page to your Public Profile.
Optional Featured Project Page settings for 8th Wall-Hosted projects include:
- Adding a "Launch" button to a Featured Project page, making it easy for visitors to demo your experience.
- Making your project code viewable and cloneable to other developers, if you so choose.
To enable either of these options:
- Select an existing project or create a new project in your workspace.
- Click on Feature Project in the left navigation.
- Scroll down to the 8th Wall-Hosted Features area at the bottom of the Feature Project page:
Launch
- The "Launch" button, if enabled:
- Allows anyone to view what is published to your project's Public URL.
- Links directly to the default 8thwall.app URL for your project. This cannot be modified.
- Is enabled by default for 8th Wall hosted projects. You can disable this before publishing your featured project page, if desired.
- Can be used for all project types including Commercial projects with both Active and Completed licenses. *
- Toggle "Launch" to Public (ON) if you wish to add it to your page. Toggle "Launch" to Hidden (OFF) if you do not want it displayed on your Featured Project page.
Cloneable Code
- The Cloneable Code feature, if enabled:
- Will make your published code viewable and cloneable to the public.
- Your Featured Project page will show your published code in a new Code tab on the page.
- A Clone button will be added to the Featured Project page to make it easy for users to clone your project into their 8th Wall workspace.
- Your Featured Project page will also clearly state the license found in the LICENSE file in your project.
- Is disabled by default for 8th Wall hosted projects. You can enable this before publishing your featured project page, if desired.
- Toggle the Cloneable Code button to Public (ON) if you wish to add it to your page. Toggle "Launch" to Hidden (OFF) if you do not want it displayed on your Featured Project page.
-
Click Publish or Save and Update.
- You will receive a confirmation message when you publish your project or save and update changes to your featured project page confirming your choice.
- If you have enabled Cloneable Code, this confirmation message will also confirm the license for your project using the LICENSE file in your published project. It is strongly recommended that you include a LICENSE file in your project when toggling Cloneable Code to Public.
-
Click Confirm to continue with your selection or click Cancel to undo your changes.